
Have you noticed that some SVG logo’s fonts change from browser to browser? Would you like to find out how to make SVG files so that the font will stay the same? In this article, I will show how to save SVG files for your web project and add them to a WordPress page using Elementor.
Is SVG a Better Alternative to PNG?
Images are great for any web design project, especially now that internet speeds are improving. We can now afford to include more images without compromising on loading time. However, some elements, especially text could appear blurry when you save them in PNG format.
The answer to this issue is SVG format. Not only do SVG files look crisp at any scale, but they are also editable, optimised for search engines, often smaller than other formats and capable of dynamic animations.
Saving your File in SVG Format
If you want to save your image with text in SVG format and ensure the font stays the same, for example in Firefox browser, use this simple trick:
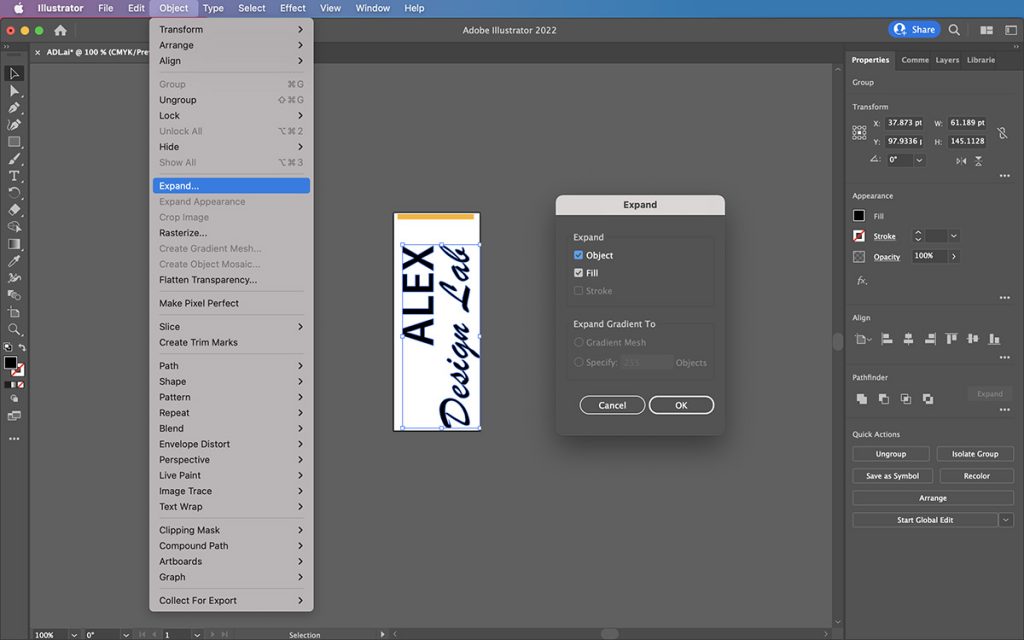
- When designing in Adobe Illustrator, select text using the selection tool and navigate to Object and Expand. In the expand dialog box make sure the checkboxes for Object and Fill are checked and click on OK button.
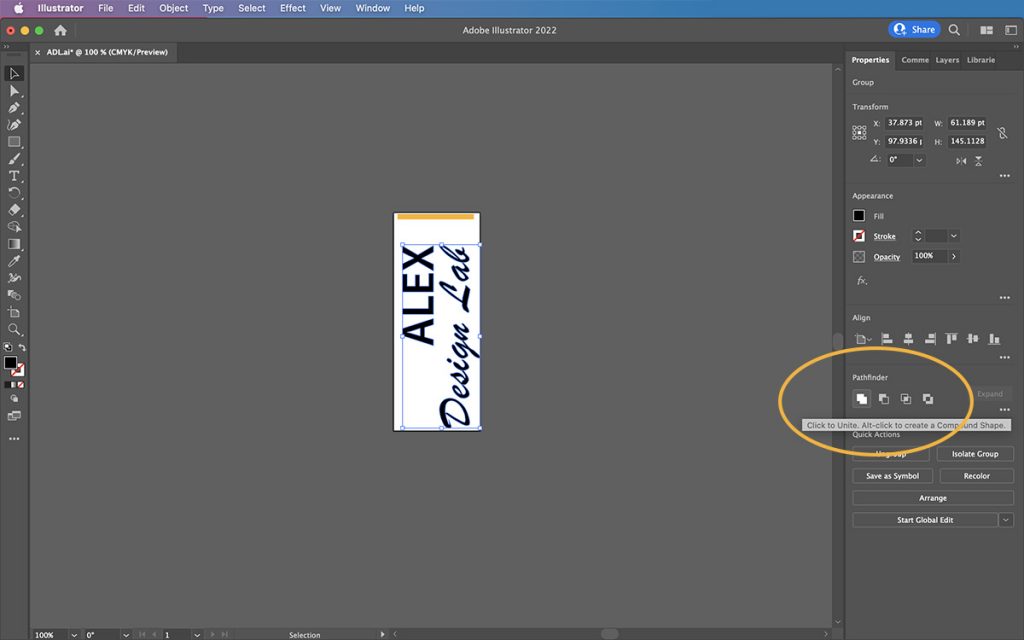
- Next, having selected the text, navigate to Pathfinder panel in the properties tab and click on the Unite icon.
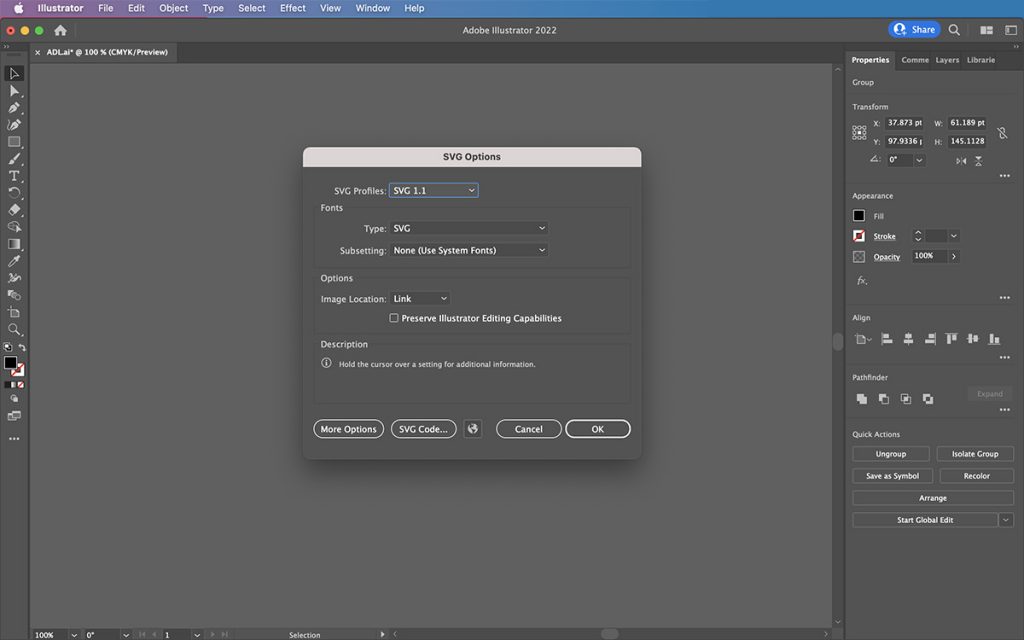
- Finally, save your image in SVG format. Navigate to File and Save As, choose where you want to save and pick the SVG (svg) option from the Format drop-down menu. Hit save and the OK button in pop-up SVG Options dialog box, and you are done!
Uploading an SVG File to the WordPress Media Library
WordPress does not support SVG out of the box, so what can you do? You can install a plugin like SVG Support or you can add the code below to your theme’s functions.php file to avoid having yet another plugin.
To do this, navigate to Appearance and Theme Editor from your WordPress Admin Dashboard. Then, under the Theme Files, locate and click on functions.php and add the following code to the PHP file at the very bottom:
					// Enable SVG support
add_filter( 'wp_check_filetype_and_ext', function($data, $file, $filename, $mimes) {
global $wp_version;
if ( $wp_version !== '4.7.1' ) {
return $data;
}
$filetype = wp_check_filetype( $filename, $mimes );
return [
'ext'             => $filetype['ext'],
'type'            => $filetype['type'],
'proper_filename' => $data['proper_filename']
];
}, 10, 4 );
function cc_mime_types( $mimes ){
$mimes['svg'] = 'image/svg+xml';
return $mimes;
}
add_filter( 'upload_mimes', 'cc_mime_types' );
function fix_svg() {
echo '';
}
add_action( 'admin_head', 'fix_svg' );
Save the changes and test this function by uploading an SVG file to the WordPress media library.
Adding an SVG File to an Elementor Page
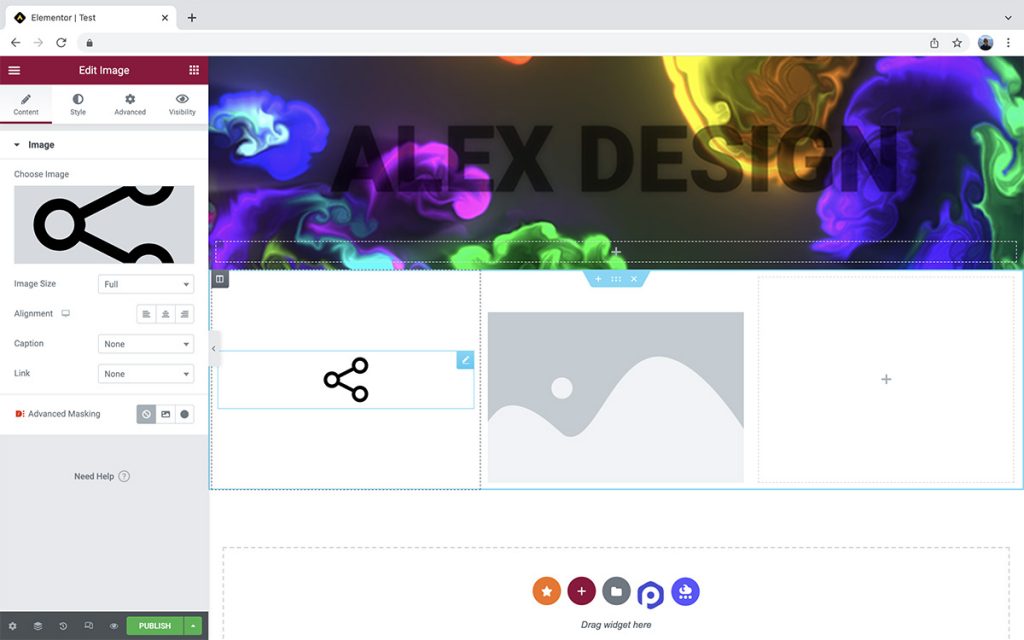
In the Elementor environment, simply use the Image widget to add your SVG file to the page, just as you add your JPG or PNG images.
It’s worth mentioning that some Elementor widgets do support SVG format, for example, the icon widget. You can select an icon from the icon library or upload SVG. When you use this method, the SVG is added to the page as inline code.
Scalable vector graphics in SVG format are useful in many different scenarios. They’re versatile, interactive, and easy to create with a graphics editor. Upgrade your logo or icons to SVG format and you will notice how much sharper and clearer they look.